Tuesday, July 14, 2009

Ok. Now that we've learned how to make balloon sizers we can move on to more exciting stuff. This post will show you how you can make use of interesting balloon shapes such as flower balloons and turn them into stage decor. Let's get on to it shall we?

Step 1. Get two flower shaped balloons and tape their sticks together. Make sure that the two balloons are of different height.


Step 2. Inflate an 11-12 inch balloon. You can use a manual pump or an electric balloon inflator, both of which are available at Party Magic. (http://partymagic.multiply.com). Inflate two of these balloons and make sure they are of the same size when inflated.

Step 3. Tie up the two inflated balloons. You can use a simple knot in tying them up but make sure the knot is secured tightly. The tied up balloons should like the picture on the right:


Step 4. Repeat Steps 1 and 2 for another two balloons. The second pair of balloons can be of the same color, or of different color if you're going for a more colorful theme. In my case I chose a mono color theme of red balloons.

Step 5. Now that we have two pairs of tied up balloons, we need to tie both of them up. Place both pairs in a perpendicular fashion (or with the middle of both pairs crossing each other). Then, grab in one hand two balloons, one from each pair, and twist them in any direction. The middle part of the structure should now form a twist and look like the picture on the right:

Step 6. Place the flower balloons on a stick in the middle of two balloons in your structure. Now twist the two balloons that are in the middle of the stick of the flower balloons to lock it tight.

Step 7. Repeat the steps above until you fill up the whole length of the stick with these twisted balloon layers. In my case it took me three layers.

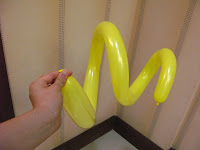
Step 8. As a finishing touch, you can also add a long twisted balloon at the top of your formation. In order to accomplish the twisted effect, wrap the uninflated long balloon around one of your arms while you ask a friend to pump it.


This structure can also serve as a centerpiece, if you have a table big enough to accommodate it.

Tadaaa! There you have it. That wasn't too hard, was it?

Til my next post,

BW
Read more...

Monday, July 13, 2009

Is it just me, or is the new Dora such a cutie (or too cute?)

Nickelodeon and Mattel earlier this year released the actual potrait of our beloved new Dora. That's right sisters. Bowl cut, shorts, and rotund body is out, long shirt, leggings, long flowing hair, and accessories (no backpack please) is in.

I wonder, is this what a 10-year old girl should look like? More importantly, is this what you want your 10-year old to look like?
What happened to the talking backpack? Where's Diego? And where's bestfriend Boots??

Here's what I think on these very important issues:

What happened to Backpack


Looks like he ate one too many spacesuits and ladders for his own good...delicioso, anyone?

What happened to Diego


Watch out Dora. You're not the only one who got hotter these past few years.

What happened to Boots

Poor Boots...turns out the human years were way too much for a simple monkey...

But never mind what I think. Tell me what you think. Dora the New Explorer or Dora-too-cute-and-powdered-up-for-her-own-good?

BW
Read more...

Sunday, July 12, 2009

Under the sea...under the sea...darling it's better, down where it's wetter take it from me! Yes, take it from me...I've been watching too many Disney movies that I'm starting to imagine bubbles out of balloons!! Yes, in this article we will try to make balloons look like bubbles.

A lot of people have asked me how to decorate their underwater, finding nemo, little mermaid, and spongebob themed parties. So I've decided to post some decoration ideas to recreate an under the sea scene to help you bring the land back to the sea! (or is it the other way around?)

You can easily use transparent or crystal clear latex balloons and make them look like bubbles. Combine these with blue colored styro backgrounds or tarps and then you'll recreate the look of 3D bubbles from the water! Some may also feel a bit extravagant on their use of balloons and do not feel comfortable with just using crystal clear balloons, so another alternative is to stuff a blue or light blue small (5 inch) latex balloon inside a crystal clear balloon. In this post, I'll also show you how to stuff balloons inside a crystal clear balloon.

The picture above shows a sample decor made by a balloon decorator abroad. The octopus is definitely a WOW! But the point here is the bubble effect and not the octopus! Instead of the octopus, you can place your balloon burst or pinatas in the middle.

Another impressive stage decor, but definitely very hard to do (the balloon flounder and sebastian). But again, the balloon bubbles set the stage for this under the sea theme to come alive!


As I mentioned awhile ago, combine the crystal clear balloons with a blue background to set the scene of bubbles underwater. You can also add tube balloons and bend them a bit to recreate the look of seaweeds and other underwater plants.

Feeling a bit uncomfortable with plain crystal clear balloons hanging from the ceiling?? You can also stuff a blue balloon inside! Here's how:


1. You'll need one crystal clear balloon (I suggest a size 10 or 12 inches) and one small blue latex balloon (size 5).


2. Get a stick and insert it inside the small balloon. This will help you insert it in the crystal balloon as shown below.


3. Insert the small balloons in the crystal balloon.


4. Inflate the small balloon first then lock it with a knot.


5. Let go of the small balloon and start to inflate the crystal balloon.


6. Tie a knot at the tail of the crystal balloon. Voila! You now have tiny bubbles inside your crystal bubbles! Also try putting white small balloons and alternately attach these bubbles to a nylon string. Let them dangle from the ceiling as bubbles floating from below.


XOXO,

BW
Read more...

Sunday, July 5, 2009

For years, I've been dreaming about owning my own party shop. It would be colorful, filled up Doras, Nemos, Mickeys, and every other character that fills children with smiles and imagination. From my ceiling would hang circular mylars, ribbons, stars, and rubber balloons of every known color to man. Kids would gawk and giggle as they look around, and scream with delight as I announce, "free chocolates to everyone!!"

Turned out that having a real store is kinda expensive. So instead, I started with a virtual one. Start small and dream big shall we?


So let me do my plug - Party Magic is your favorite online party store, filled with everything you need for any kiddie party: mylars, supershapes, paper cups, plates, name tags, invitations, party hats, blowers, loot bags, tiaras, pinatas, you name it. What's even better is that our prices are very competitive since we source our products directly from suppliers. We handpick each design and product so as to ensure their quality as well. If you're planning your kid's party, a baby shower, or any event, be sure to visit our site:

http://partymagic.multiply.com/

Til next time!

BW
Read more...

Thursday, July 2, 2009

Now that we have our very own balloon sizer, we're now ready for our next task: measuring balloons using the sizer. I know I know, why not just try to estimate the size of the balloon you're inflating by putting it side by side with an already inflated balloon? Well for one, I've tried this method while making my own balloon pillar, and it does not work. You'll be surprised at how the eye can deceive you in estimating sizes. In a nutshell, my pillar ended up looking like the Leaning Tower of Pisa. So on to the article:

Using your balloon sizer is very easy, however the inflating part sometimes becomes tricky. First, I'll show you three types of inflated balloons so you can check whether yours is properly inflated. Second, I will show you how to use your sizer with the properly inflated balloon.

Some balloons, when inflated,
do not come out as perfectly round. So, the head of the balloon becomes under inflated while the rest of the air remains at the tail of the balloon. So when you slip it through your sizer, it does not measure up to your required size. Some people will continue inflating their balloon until they fit perfectly into the balloon sizer, not knowing that their balloon is already over inflated and now looks like an avocado!! (yum)

It looks like an avocado because of overinflating the balloon where the air already fills up the space for the tail (or the elongated or tube part of the balloon). The tail is NOT SUPPOSED TO BE FILLED UP WITH AIR. Its purpose is for the knot you will be making to secure the air inside the balloon.

Below are the three types of inflated balloons. Notice the differences to make sure that you use your balloons properly and you get the most f
or the balloons you paid for:

1. Under-
inflated:

Clearly an underinflated balloon suggested by its long uninflated neck. Unless you want to use them for games that require sitting or stomping to pop the balloons, underinflating the balloon would pose more challenges to the game. Attempting to pop an under-inflated balloon will displace air into the uninflated portion (tail or neck part) and redistribute the stress to the rest of the balloon without popping.


2. Fully inflated
:
This is a fully-inflated balloon and the right size for most games and decorations. Full inflation is characterized by a round balloon that SLIGHTLY fills up the neck but when you press both ends of the balloon, it will form a perfectly round shape.

3. Over inflated:

This is obviously over-inflated as characterized by the long inflated neck. The balloon is very tight and may make a ringing sound when tapped. Cover your ears, hide your children, and run for your life when you see this balloon, as it's just one fingernail away from popping!!


Measuring your balloons in the sizer

When you already have with you a perfectly round and inflated balloon, carefully slip it into your sizer, and if it passes through successfully and without force, the balloon is in the size specified in your sizer.
Till next time,

BW
Read more...

Wednesday, July 1, 2009

I know what you're thinking. Who in the world needs a balloon sizer anyway?? Well being able to make balloon sizers is actually one of the basic skills that every professional balloon decorator should have. So all you mommies out there, fold up your sleeves and let's start!

How to make a balloon sizer using nothing but carton (literally!)

One secret to professional looking balloon pillars and arches is to inflate the balloons exactly in the same sizes. Professionals use a "balloon sizer", usually a plastic box or a flat plane with circular cut-outs of the different balloon sizes.

You can either purchase your own balloon sizer or with the recession squeezing our budget, you can inexpensively create your own balloon sizer and create balloon pillars and arches like a pro!

Step 1: Take a large cardboard box, preferably a square box. In my case, I could not find an evenly-sided box so I had to do with what I had at home: an old carton box my brother used to store his old dvds (no this is not porn!)
Step 2: Mark out the center of your circle. Get a ruler and from your point in the center, mark the radius from the center to the side. I started with the 10 inch size since this is often the size used for pillars and entrance arches.Step 3:Using the marks you've placed on four points of your circle (left, right, top bottom) and the center point, get a compass to mark out your perfect circle.
Step 4: Using a cutter, carefully cut out the circle you've marked with your compass.
With just a few simple steps, we're done in making our own balloon sizer! Repeat these steps with other balloon sizes (5, 8, 9, 11 and 12) and you can start making your own balloon structures!!

XOXO,

BW
Read more...

Tuesday, June 30, 2009

No, this is not a blog about extremely wealthy and decadent high school teenage girls who frolic around the streets of New York in their designer Guccis and Pradas with overly gorgeous boys dancing on their fingertips. Rather, this blog is about parties. And not the sort of filled with booze and scantily clad women either. I am here to talk about parties with kids in them. Kiddie parties, children parties, parties of that sort.

When a close friend of mine whose son was about to turn 1 year old came up to me and asked for help in organizing her kid's 1st birthday party, that's when it all started for me. Both of us searched for the right venue, the right decorator, balloon decor package, the right theme, and the works, and I was initiated into the world of balloons.

I recently opened my own online party store, Party Magic, and the feedback I have been receiving from customers have been very enlightening to say the least. So many have come up to me and have asked for various advice.

So my goal with this blog is to talk about anything and everything related to kiddie parties, and also help all those new mommies, mommies who would like to be more hands-on with their kid's party experience, and even those people who are interested in the kiddie party/balloon/decoration industry. We can talk about themes, decorations, types of balloons, designs, anything you want!

So until my next post,

BW
Read more...